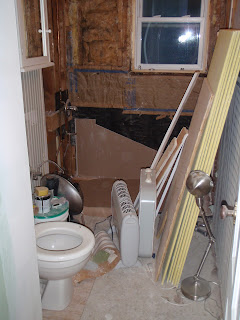
I've been putting off this post for as long as I could. Our bathroom renovation was complicated. Unexpected issues cropped up constantly and even though the bathroom space is small, the small size was the cause of a lot of design headaches.
When we toured the house the bathroom was in good shape. It had a reasonably new tub, clean fixtures, and the layout was definitely workable. Initially we had thought we'd keep the bathroom as it was, but as we got further into our renovation work we kept hearing the old mantra about the bathroom and kitchen being the most important aspects of a house renovation and begrudgingly began reworking the budget to include it.
The bathroom had a few problems. The most pressing was the small window over the tub. It provided the only natural light in the room and was the only way to vent the space, but was exposed to the shower head and wasn't protected from water damage. Zach and I decided that since it was unreasonable to remove it we'd try to find a way to protect the sill. However we couldn't really move the tub without expanding the bathroom into the front bedroom, which was already suffering from space limitations. Our solution? a claw foot tub with shower fixture and curtain surround. I scoured ebay, the classifieds, and craigslist for a claw foot tub small enough to fit in the space and finally found one that had been removed from an apartment just down the street! We also found a great local tub refinisher and was able to restore the tub to its previous glory, all for less than the price of reproduction tubs (around half the price) that were the same size and style. We were also able to find reproduction fixtures for a great price online.
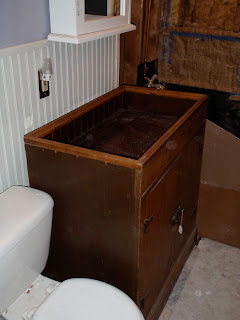
Next we needed to figure out how to increase the storage in the bathroom. When we bought the house there was only a small medicine cabinet in the space and the family had relied extensively on the linen closet in the hallway for storage, but we wanted to be able to store away all our bathroom products without having to jump across the hallway to get toothbrushes or shampoo. At first I had experimented with designing a sink cabinet from an old antique furniture piece. But nothing was small enough to accommodate the new tub (and associated spacing) and the toilet, even after we had enclosed the chimney and gained some floor space by removing the strange half "box" around the stack. I eventually settled on a sink cabinet that had two drawers and an open space underneath to help make the bathroom feel larger. It really helped. We also replaced the medicine cabinet with a "picture frame" style that hid all the hinges AND replaced all the light fixtures with 1920's style ones from a restoration company (used and a steal). How'd we do?
 |
| Experiment in Bathroom Design - My Sketch of a Converted Antique Furniture Piece |
 |
| Old Antique Wash Stand - Way Too Big |
 |
| Zach - Squished |
 |
| Still Too Big |
 |
| Bathroom Mostly Gutted |
 |
| Tile |
 |
| A Modern Cabinet - Still Too Big (notice the tub paper cutout in the background for size) |
 |
| Fantastic Reproduction Tub Fixture (awesome) |
 |
| We got this faucet for a steal! |
 |
And it FITS! (The tub actually was originally two-toned)
|
 |
| Still Fits! |
 |
| The New Toilet (funny that you can get excited about a new toilet... but I love it!) |
 |
| A close-up of our new light fixture and an etsy towel rack made from salvaged tin ceiling. |


